- Make sure you install Xray Test Management for Jira from the Atlassian Marketplace.
- Identify your test management project to include Test issue type or create a new project with Xray Test Project template.
Prepare the CSV
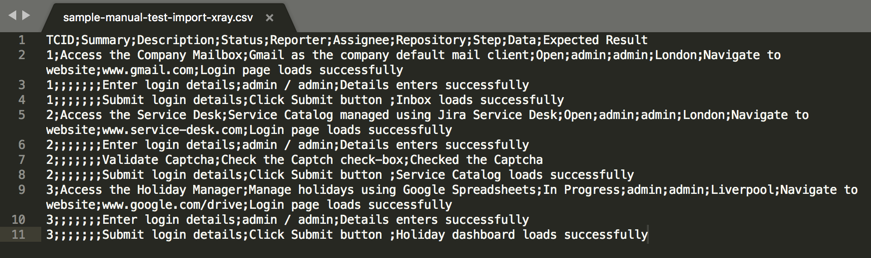
The screenshot below shows a sample test case which is managed using an Excel spreadsheet. Your test cases, normally saved in an XLS format, will need to be exported into a tabular formatted CSV file.

Remember to map the three mandatory fields:
- Test Case Identifier: This field identifies which lines belongs to which test case. In the example below, it is the TCID column. The TCID is used to associate the different test steps.
- Summary: This field is mandatory, as Jira doesn’t allow users to create an issue without a summary. In the example below, it is the Summary column.
- Manual Test Step: This field is going to be mapped as the Step field, Data field, and Expected Result field of a Manual Test Step. In the example below, it is the Step, Data, and Expected_Result column.
Import your test cases into Xray Test Management for Jira
The following steps will show you how to import your test cases, allowing Jira to become a powerful test management tool. 1. Login with an administrator account and got to External Issue Import. 2. Next, choose the Xray Test Case Importer as follows: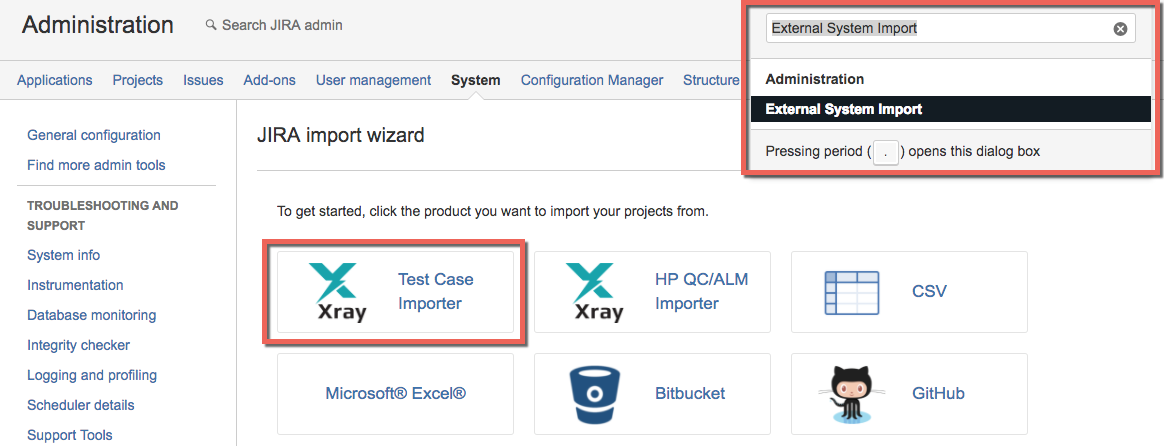 3. Setup the basic settings for importing the CSV file:
a - Choose the CSV source file.
b- Make sure the CSV delimiter is defined correctly.
c- Check your File Encoding.
d- Optionally, choose the configuration file if you saved your settings from your previous import.
 4. Map your Xray test Project, Fields, and Field values and click
Begin Import:
4. Map your Xray test Project, Fields, and Field values and click
Begin Import:
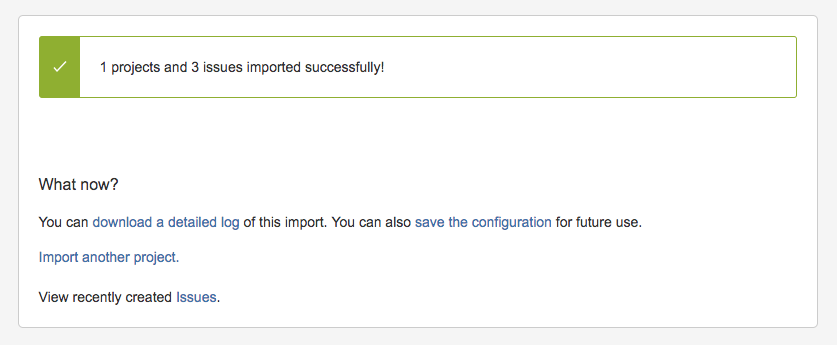
 Afterwards, your status page will show the import results. If you'd like to take a closer look at the results, click on the
download a detailed log link. [info]
Tip: If you plan to import another batch of tests, then don't forget to
save the configuration file so you can use it next time.[/info]
Afterwards, your status page will show the import results. If you'd like to take a closer look at the results, click on the
download a detailed log link. [info]
Tip: If you plan to import another batch of tests, then don't forget to
save the configuration file so you can use it next time.[/info]
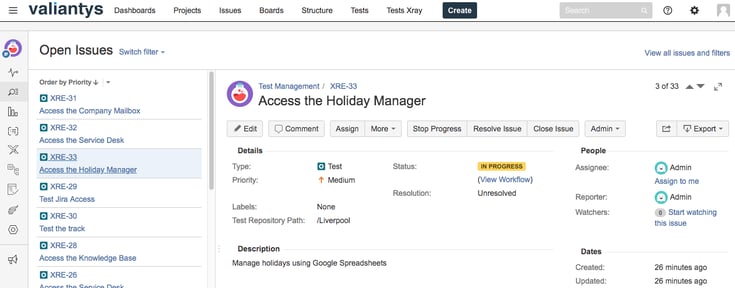
 5. Go to your selected test project to view the imported tests:
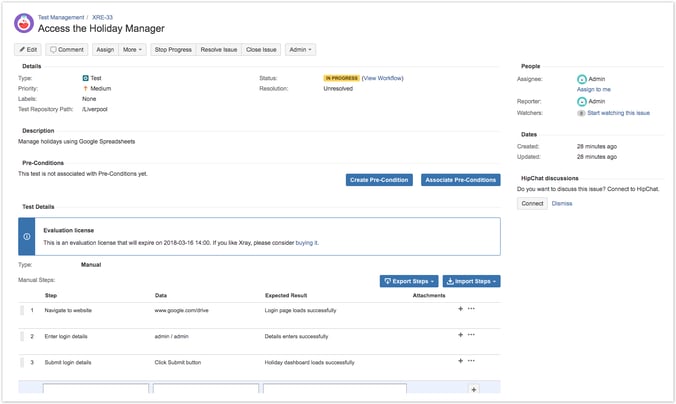
The order of test steps will be as listed in your CSV file. If you need to change the order later, simply drag-and-drop your steps:
 Leave us a comment if you have any questions, suggestions or feedback! Likewise if you need more one-on-one help with your Test Management solution in Jira, contact the Valiantys team below.
Leave us a comment if you have any questions, suggestions or feedback! Likewise if you need more one-on-one help with your Test Management solution in Jira, contact the Valiantys team below.